
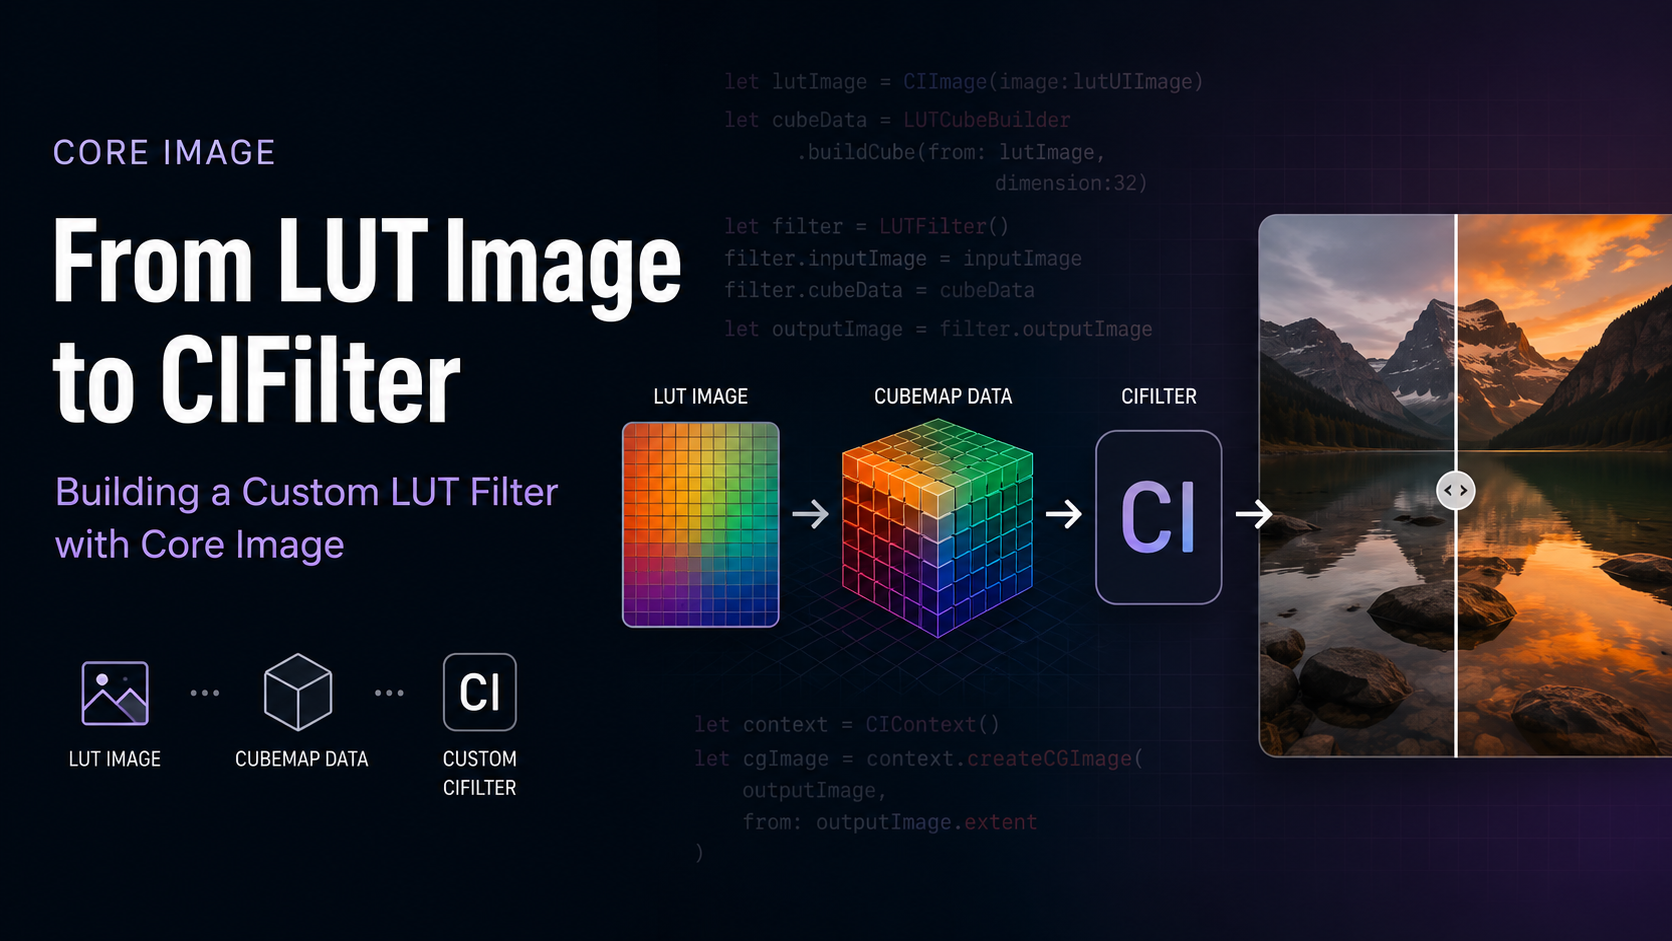
Core Image Filters
Apple’s CoreImage library is a powerful framework that let’s you manipulate images and video streams with little boilerplate and without requiring you to dabble in lower level graphical APIs.
Core Image ships with a large collection of built-in filters, known as CIFilters. Each filter performs a single image-processing operation, such as adjusting brightness, applying a blur, detecting edges, or generating entirely new images.
Every filter has three main parts:
- A unique filter name (e.g.
CISepiaTone) - A set of input parameters
- An output image
A filter doesn’t modify an image directly. Instead, it produces a new CIImage representing the result of its operation.
let filter = CIFilter.sepiaTone()
filter.inputImage = inputImage
filter.intensity = 0.8

let outputImage = filter.outputImageOne of Core Image’s strengths is that filters are lazy. Constructing a filter chain performs almost no work immediately. Instead, Core Image builds an image processing graph describing how to produce the final image. Rendering only occurs when the image is drawn or explicitly rendered into a destination.
This allows surprisingly complex filter pipelines to remain efficient.
Discovering Filters
Apple provides well over a hundred built-in filters, grouped into categories such as:
- Color Adjustment
- Blur
- Distortion
- Stylize
- Sharpen
- Composite Operations
- Reduction
- Transition
- Generator
Although you don’t need to memorize them, it’s worth browsing the available filters from time to time. Many effects that seem like they’d require custom shaders already exist.
You can inspect available filters programmatically:
let names = CIFilter.filterNames(inCategory: kCICategoryBuiltIn)Or simply search Apple’s Core Image Filter Reference whenever you’re looking for a specific effect.

Chaining Filters
Since every filter outputs a CIImage, the output of one filter naturally becomes the input of another.
let monochrome = CIFilter.colorMonochrome()
monochrome.inputImage = image

let bloom = CIFilter.bloom()
bloom.inputImage = monochrome.outputImage
bloom.intensity = 0.6

let finalImage = bloom.outputImageThis composability is what makes Core Image so expressive. Rather than creating one enormous filter, you combine many small, focused operations together.
Rendering the Result
Eventually, you’ll want pixels.
Rendering is performed by a CIContext.
let context = CIContext()

let cgImage = context.createCGImage(
    outputImage,
    from: outputImage.extent
)From there you can create a UIImage, NSImage, write the image to disk, or continue processing it elsewhere.
When Built-in Filters Aren’t Enough
The built-in filter library covers an impressive range of image operations, but eventually you’ll encounter an effect that isn’t represented by a single CIFilter.
Sometimes the solution is combining several existing filters. Other times, you’ll need to provide Core Image with additional data that it doesn’t know how to interpret on its own.
LUTs (Color Lookup Tables)
One interesting example is cinematic Color Lookup Tables (LUTs). While Core Image includes filters capable of applying color cubes, most LUTs distributed by photographers and filmmakers come as ordinary image files rather than the data format those filters expect.
Bridging that gap—reading a LUT image, transforming it into the structure Core Image expects, and packaging the result into a reusable filter—turns out to be an excellent example of extending Core Image without writing a custom GPU kernel.
In the next section, we’ll walk through that process.
Building a Custom CILUTFilter from a LUT Image
One of the nicest features of Core Image is CIColorCube, which performs extremely fast GPU-accelerated color grading using a 3D lookup table (LUT).
The catch? CIColorCube doesn’t understand the LUT images you download from the internet. Instead, it expects a blob of floating-point values representing a 3D color cube.
So let’s bridge that gap.
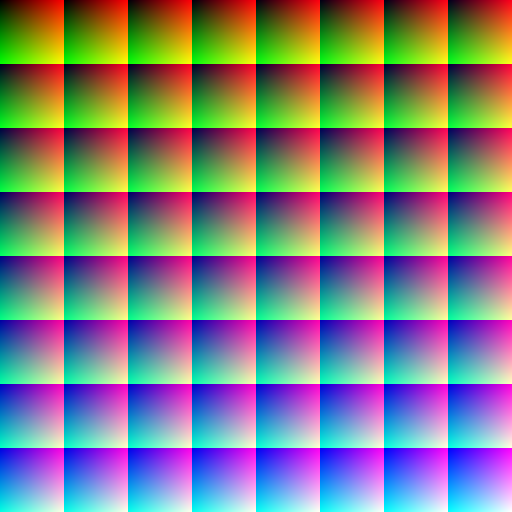
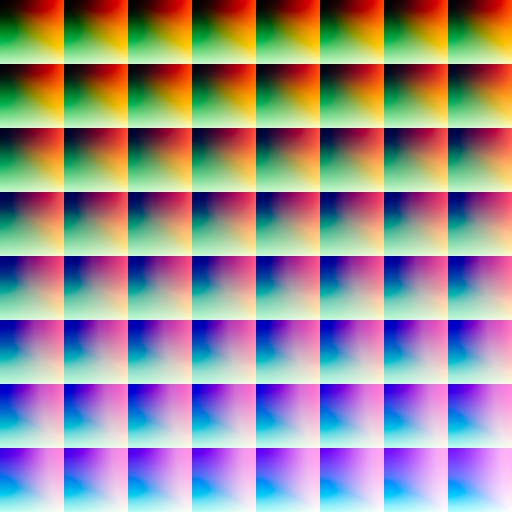
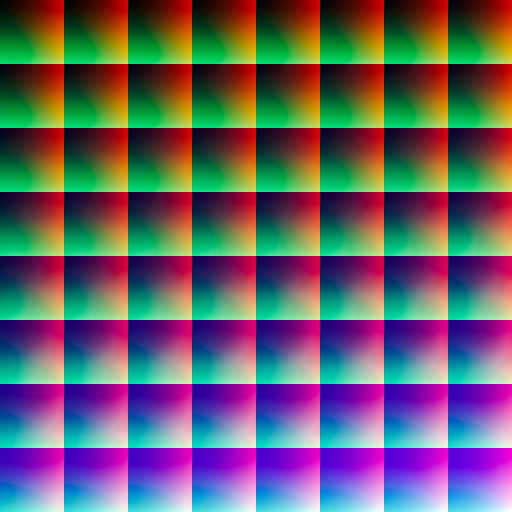
In this article we’ll build a reusable CIFilter subclass that accepts a standard LUT image and converts it into the format expected by CIColorCube.
Step 1 — Create a custom filter
Our filter exposes two inputs:
inputImage— the image we want to process.lutImage— the lookup table image.
Internally, it owns a CIColorCube filter that will do the actual color transformation.
 1@dynamicMemberLookup
 2open class CILUTFilter: CIFilter {
 3    @objc dynamic public var inputImage: CIImage?
 4    @objc dynamic public var lutImage: CIImage?
 5
 6    // The underlying Core Image filter.
 7    private let colorCube = CIFilter.colorCube()
 8
 9    // Used for converting CIImages into CGImages.
10    private let context = CIContext()
11}At this point our class is little more than a wrapper, but it gives us a place to hide all of the conversion logic.
Step 2 — Initializing with a LUT
The designated initializer simply accepts a CIImage.
init(image: CIImage) {
    self.lutImage = image
    super.init()
}In my project, LUTs are represented by a LUT enum, where each case provides its corresponding lookup table image through lut.image.
That makes it easy to add a convenience initializer.
convenience init(_ lut: LUT) {
    self.init(image: lut.image)
}Now creating a filter is as simple as passing an enum case instead of manually loading image assets.
Step 3 — Making the API pleasant to use
Since my LUTs are predefined, I exposed them through @dynamicMemberLookup.
public static subscript(
    dynamicMember keyPath: KeyPath<LUTConfiguration, LUT>
) -> CILUTFilter {
    .init(LUTConfiguration.shared[keyPath: keyPath])
}This allows for a very natural API:
let filter = CILUTFilter.agfaVista
filter.inputImage = imageI also added a convenience constructor to CIFilter.
extension CIFilter {
    public static func lutFilter(_ lut: LUT) -> CILUTFilter {
        .init(lut)
    }
}It’s a small quality-of-life improvement, but it makes the custom filter feel like it belongs alongside the built-in Core Image filters.
Step 4 — Returning the output image
Like every CIFilter, we override outputImage.
public override var outputImage: CIImage? {
    setupColorCubeFilter()
    return colorCube.outputImage
}The interesting work happens inside setupColorCubeFilter(), where we transform a flat image into a real 3D lookup table.
Step 5 — Validating the LUT
First we make sure we actually have both images.
guard let lutCIImage = lutImage,
      let inputImage else {
    return
}

let size = 64

let lutImage = context.createCGImage(
    lutCIImage,
    from: lutCIImage.extent
)!

let lutWidth = lutImage.width
let lutHeight = lutImage.height

let rowCount = lutHeight / size
let columnCount = lutWidth / sizeThis implementation expects a 64³ LUT, meaning:
- each slice is 64×64 pixels,
- there are 64 slices in total,
- and those slices are arranged into a rectangular grid.
Before doing any work, we verify that assumption.
if lutWidth % size != 0 ||
   lutHeight % size != 0 ||
   rowCount * columnCount != size {

    NSLog("Invalid colorLUT")
    return
}Failing early here avoids building an invalid color cube.
Step 6 — Reading the pixels
Now we read every pixel from the LUT image.
let bitmap = getBytesFromImage(image: lutImage)!

let floatSize = MemoryLayout<Float>.size

let cubeData = UnsafeMutablePointer<Float>.allocate(
    capacity: size * size * size * 4 * floatSize
)The bitmap contains ordinary 8-bit RGBA values.
CIColorCube, however, expects normalized floating-point values in the range 0…1, so each component will later be divided by 255.
Step 7 — Reconstructing the 3D cube
This is where the magic happens.
The LUT image looks two-dimensional, but it’s really a stack of color slices laid out in rows and columns.
The nested loops walk across the image one pixel at a time and place each color into its correct (x, y, z) position inside the cube.
var z = 0
var bitmapOffset = 0

for _ in 0..<rowCount {

    for y in 0..<size {

        let tmp = z

        for _ in 0..<columnCount {

            for x in 0..<size {

                // Read one pixel from the LUT image.
                let alpha = Float(bitmap[bitmapOffset])     / 255.0
                let red   = Float(bitmap[bitmapOffset + 1]) / 255.0
                let green = Float(bitmap[bitmapOffset + 2]) / 255.0
                let blue  = Float(bitmap[bitmapOffset + 3]) / 255.0

                // Compute its position inside the cube.
                let dataOffset =
                    (z * size * size + y * size + x) * 4

                cubeData[dataOffset + 3] = alpha
                cubeData[dataOffset + 2] = red
                cubeData[dataOffset + 1] = green
                cubeData[dataOffset + 0] = blue

                bitmapOffset += 4
            }

            z += 1
        }

        // Restart from the first slice in this row.
        z = tmp
    }

    // Continue with the next row of slices.
    z += columnCount
}At first glance the indexing looks intimidating, but conceptually it’s simply translating this:
2D Image
+-------+-------+-------+
|Slice 0|Slice 1|Slice 2|
+-------+-------+-------+
|Slice 8|Slice 9|Slice10|
+-------+-------+-------+into this:
3D Cube

z
↑
│
├── Slice 2
├── Slice 1
├── Slice 0
└────────────→ x
      ↓
yOnce you realize that each square in the LUT image represents a different Z slice, the indexing logic becomes much easier to follow.
Step 8 — Handing everything to CIColorCube
Once the cube is complete, we package it as Data and configure the underlying filter.
let colorCubeData = NSData(
    bytesNoCopy: cubeData,
    length: size * size * size * 4 * floatSize,
    freeWhenDone: true
)

colorCube.cubeData = colorCubeData as Data
colorCube.cubeDimension = Float(size)
colorCube.inputImage = inputImageFrom here on, Core Image takes over. The expensive conversion only happens once, while the actual color grading is performed efficiently on the GPU.
Step 9 — Extracting bitmap bytes
The only helper method converts a CGImage into a flat RGBA byte array.
private func getBytesFromImage(image: CGImage?) -> [UInt8]? {
    guard let image else { return nil }

    let width = image.width
    let height = image.height

    let bytesPerRow = width * 4
    let totalBytes = bytesPerRow * height

    let bitmapInfo =
        CGImageAlphaInfo.premultipliedLast.rawValue |
        CGBitmapInfo.byteOrder32Little.rawValue

    let colorSpace = CGColorSpaceCreateDeviceRGB()

    var intensities = [UInt8](repeating: 0, count: totalBytes)

    let context = CGContext(
        data: &intensities,
        width: width,
        height: height,
        bitsPerComponent: 8,
        bytesPerRow: bytesPerRow,
        space: colorSpace,
        bitmapInfo: bitmapInfo
    )

    context?.draw(image, in: CGRect(
        x: 0,
        y: 0,
        width: width,
        height: height
    ))

    return intensities
}Nothing particularly exciting happens here—we simply ask Core Graphics to render the image into memory so we can iterate over its pixels.
Putting it all together
Using the filter ends up feeling just like using any built-in Core Image filter.
let filter = CILUTFilter.agfaVista
filter.inputImage = inputImage

let output = filter.outputImageOr, through the convenience constructor:
let filter = CIFilter.lutFilter(.agfaVista)
filter.inputImage = inputImage

let output = filter.outputImageThe nice part is that callers never need to think about 3D cubes, slice layouts, or pixel conversion. They simply provide a LUT image and get back a standard CIFilter that plugs seamlessly into the rest of the Core Image pipeline.
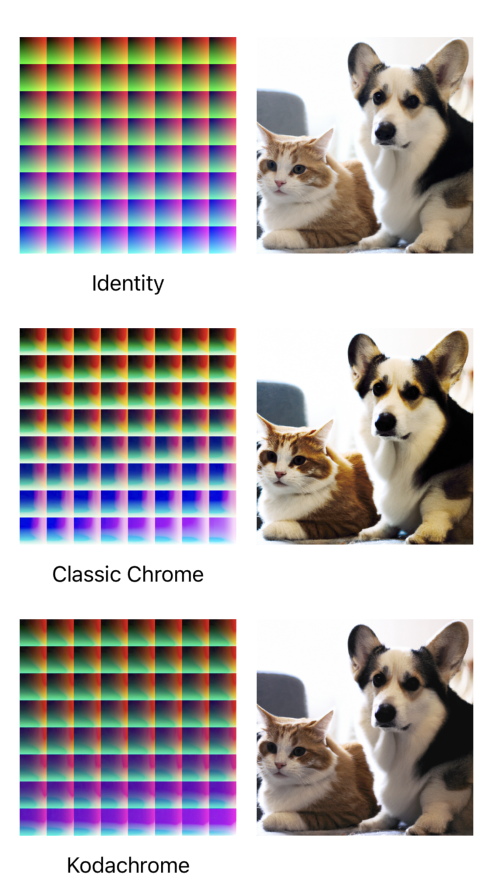
Full Implementation
This is the full implementation of CILUTFilter.
  1//  CILUTFilter.swift
  2
  3import CoreImage
  4import CoreImage.CIFilterBuiltins
  5import Foundation
  6import simd
  7
  8@dynamicMemberLookup
  9open class CILUTFilter: CIFilter {
 10    @objc dynamic public var inputImage: CIImage?
 11    @objc dynamic public var lutImage: CIImage?
 12
 13    private let colorCube = CIFilter.colorCube()
 14    private let context = CIContext()
 15
 16    init(image: CIImage) {
 17        self.lutImage = image
 18        super.init()
 19    }
 20
 21    convenience init(_ lutImage: LUT) {
 22        let lutImage = lutImage.image
 23        self.init(image: lutImage)
 24    }
 25
 26    public static subscript(dynamicMember keyPath: KeyPath<LUTConfiguration, LUT>) -> CILUTFilter {
 27        .init(LUTConfiguration.shared[keyPath: keyPath])
 28    }
 29
 30    public required init?(coder: NSCoder) {
 31        assertionFailure("init?(coder:) has not been implemented")
 32        return nil
 33    }
 34
 35    public override var outputImage: CIImage? {
 36        setupColorCubeFilter()
 37        return colorCube.outputImage
 38    }
 39}
 40
 41extension CIFilter {
 42    public static func lutFilter(_ lut: LUT) -> CILUTFilter { .init(lut) }
 43}
 44
 45extension CILUTFilter {
 46    private func setupColorCubeFilter() {
 47        guard let lutCIImage = lutImage,
 48              let inputImage else { return }
 49
 50        let size = 64
 51
 52        let lutImage    = context.createCGImage(lutCIImage, from: lutCIImage.extent)
 53        let lutWidth    = lutImage!.width
 54        let lutHeight   = lutImage!.height
 55        let rowCount    = lutHeight / size
 56        let columnCount = lutWidth / size
 57
 58        if ((lutWidth % size != 0) || (lutHeight % size != 0) || (rowCount * columnCount != size)) {
 59            NSLog("Invalid colorLUT")
 60            return
 61        }
 62
 63        let bitmap  = getBytesFromImage(image: lutImage)!
 64        let floatSize = MemoryLayout<Float>.size
 65
 66        let cubeData = UnsafeMutablePointer<Float>.allocate(capacity: size * size * size * 4 * floatSize)
 67        var z = 0
 68        var bitmapOffset = 0
 69
 70        for _ in 0 ..< rowCount {
 71            for y in 0 ..< size {
 72                let tmp = z
 73                for _ in 0 ..< columnCount {
 74                    for x in 0 ..< size {
 75
 76                        let alpha   = Float(bitmap[bitmapOffset]) / 255.0
 77                        let red     = Float(bitmap[bitmapOffset+1]) / 255.0
 78                        let green   = Float(bitmap[bitmapOffset+2]) / 255.0
 79                        let blue    = Float(bitmap[bitmapOffset+3]) / 255.0
 80
 81                        let dataOffset = (z * size * size + y * size + x) * 4
 82
 83                        cubeData[dataOffset + 3] = alpha
 84                        cubeData[dataOffset + 2] = red
 85                        cubeData[dataOffset + 1] = green
 86                        cubeData[dataOffset + 0] = blue
 87                        bitmapOffset += 4
 88                    }
 89                    z += 1
 90                }
 91                z = tmp
 92            }
 93            z += columnCount
 94        }
 95
 96        let colorCubeData = NSData(bytesNoCopy: cubeData, length: size * size * size * 4 * floatSize, freeWhenDone: true)
 97
 98        // create CIColorCube Filter
 99        colorCube.cubeData = colorCubeData as Data
100        colorCube.cubeDimension = Float(size)
101        colorCube.inputImage = inputImage
102    }
103
104
105    private func getBytesFromImage(image: CGImage?) -> [UInt8]? {
106        guard let image else { return nil }
107        var pixelValues: [UInt8]?
108
109        let width = Int(image.width)
110        let height = Int(image.height)
111        let bitsPerComponent = 8
112        let bytesPerRow = width * 4
113        let totalBytes = height * bytesPerRow
114
115        let bitmapInfo = CGImageAlphaInfo.premultipliedLast.rawValue | CGBitmapInfo.byteOrder32Little.rawValue
116        let colorSpace = CGColorSpaceCreateDeviceRGB()
117        var intensities = [UInt8](repeating: 0, count: totalBytes)
118
119        let contextRef = CGContext(data: &intensities, width: width, height: height, bitsPerComponent: bitsPerComponent, bytesPerRow: bytesPerRow, space: colorSpace, bitmapInfo: bitmapInfo)
120        contextRef?.draw(image, in: CGRect(x: 0.0, y: 0.0, width: CGFloat(width), height: CGFloat(height)))
121
122        pixelValues = intensities
123        return pixelValues!
124    }
125}